Automotive restraint systems — engineered components Call +91 9920638354 info@autogleam.in

Manufacturing / Production sequence

Inside the
process.

A seat belt passes through a defined sequence before it becomes a finished assembly. This is that sequence — described as it is, without invented machinery or specifications we do not hold.

Stations  Seven Input  Webbing & hardware Output  Finished seat belt assemblies Governing principle  Repeatability

The manufacturing sequence, station by station

Station 01 — Material

It starts with what you let through the door.
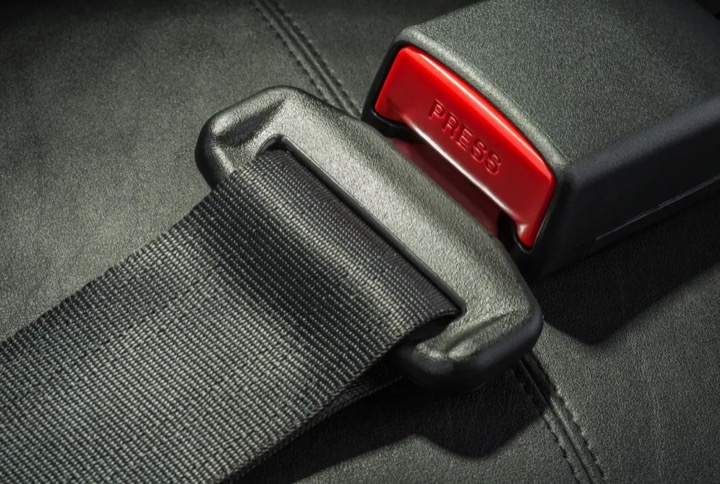
Close view of woven seat belt webbing threaded through a latch plate beside a red release button on the buckle
ST 01 Woven webbing running through the latch plate

Webbing is the load-carrying element of the whole assembly, and it is not interchangeable. Weave, width, thickness and finish all change how a belt feeds through a latch plate, how it sits across an occupant, and how it behaves after months of daily use.

Hardware arrives the same way — latch plates, buckle housings, anchor plates, adjusters and fixings. Each is checked on receipt for finish, form and obvious defects before it is accepted into stock.

Material that is not right is rejected at this point, not reworked later. A problem caught at goods-in costs a delivery. The same problem caught after assembly costs a batch, and after despatch it costs trust.

  • M1WebbingSelected for the application, checked for weave consistency, width and edge condition.
  • M2Metal hardwareLatch plates, anchor plates and fixings examined for form, finish and burrs before use.
  • M3Moulded componentsBuckle housings and covers checked for moulding defects and correct fit of moving parts.
  • M4ThreadChosen to suit the webbing and the stitch pattern the assembly calls for.
Station 02 — Cutting & preparation

Length, edge and orientation are decided here.

Diagram: webbing cut to length with the cut edge sealed and both ends marked for orientation CUT LENGTH SEALED EDGE ORIENTATION MARKED

Scroll to see the full diagram

Webbing is cut to the length the assembly requires. That length is not a rough figure — it determines whether the belt reaches its anchor points comfortably, whether there is enough travel through the adjuster, and whether the finished assembly sits correctly when fitted.

Cut ends are finished so the weave does not fray back into the working length of the belt. Webbing also has an orientation: which face sits against the occupant, and which way the latch plate is threaded. Getting that wrong produces a belt that technically functions but twists in use.

Preparation is where most downstream errors are prevented. A piece that enters assembly at the wrong length or the wrong way round cannot be corrected by a good stitch.

Note
Where a customer’s application needs a specific length or routing, that is confirmed before cutting begins rather than adjusted afterwards.

Station 03 — Assembly

Parts are brought together in a fixed order.

Assembly is where webbing, latch plate, adjuster, anchor hardware and buckle come together into something recognisable as a seat belt. The order in which they are combined is not left to the individual — it is set for the job, because the sequence determines what can still be checked and what becomes captive.

Routing matters as much as the parts themselves. Webbing has to pass through a latch plate and any adjuster the right way, with the correct face outward, without a twist anywhere along the run. A twisted belt is uncomfortable at best and loads unevenly at worst.

Controlled assembly means the same hands-off result regardless of who is at the bench. Fixtures, references and a defined sequence do the remembering so the operator can concentrate on condition rather than on method.

RoutingA/01

Webbing path through latch plate and adjuster is fixed by the setup, with the correct face and no twist along the run.

PositioningA/02

Hardware sits at the position the assembly calls for — located before it is fixed, not adjusted after.

SequenceA/03

Operations run in a defined order so nothing that still needs checking ends up trapped behind a completed step.

In-line checkA/04

The assembly is looked at before it leaves the station, so a fault is caught at the point it was created.

Station 04 — Stitching

The stitch is a structural element.

Diagram: a stitched joint in seat belt webbing, showing the stitch block placed within the folded overlap STITCH BLOCK OVERLAP PATTERN, PLACEMENT AND THREAD ARE PART OF THE DESIGN

Scroll to see the full diagram

Where webbing is joined to itself or wrapped around hardware, the stitching is what holds the assembly together. It is not decoration and it is not a finishing touch: it is the joint.

Pattern, placement and thread are specified for the job. The stitch block has to sit in the right position within the overlap, be complete, and be free of skipped or loose runs. Stitching that wanders outside its intended area changes how load is carried through the joint.

Stitch lines are inspected as joints, not as appearance. A tidy-looking seam in the wrong position is still a fault.

On specifications

We describe stitch patterns generically here because the correct pattern depends on the assembly being made. Specific stitching detail for a particular product is confirmed against that requirement rather than published as a general claim.

Station 05 — Hardware integration

The locking half has to be exact.

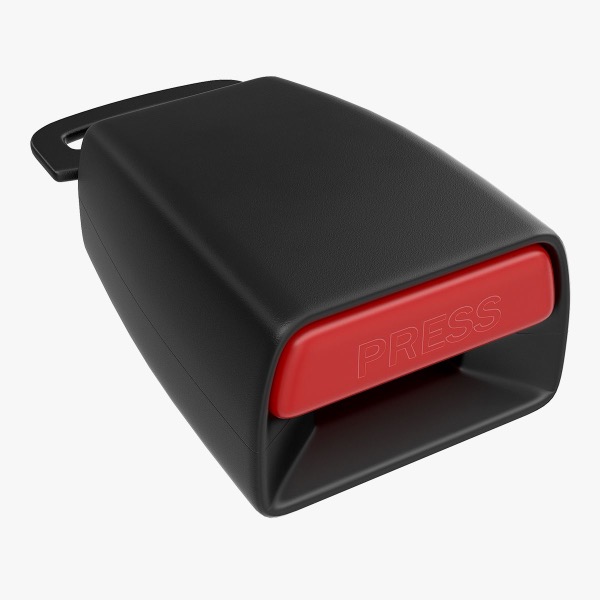
Seat belt buckle receiver housing with a red press-release button, shown on its own against a plain background
ST 05 Buckle receiver with press release

Buckles, receivers, anchor plates, guide loops and adjusters are integrated into the assembly at this stage. These are the parts a user actually operates, so their behaviour is judged directly every time the belt is fastened.

Engagement has to be positive: the latch plate should enter cleanly and hold without needing to be persuaded. Release has to be predictable: a single deliberate press, with the same effort each time, and no tendency to release when it should not.

Anchor hardware is positioned so load is carried into the mounting points the way the assembly intends. Fixings, bushes and spacers are part of that path and are treated as part of the product rather than as loose extras.

Every buckle on an assembly is operated before that assembly moves on.

Station 06 — Inspection

Checking is part of the line, not the end of it.

Inspection happens along the sequence as well as at the end. Each station is responsible for the condition of what it passes on, which means most faults are found close to where they were created and while they can still be corrected cheaply.

The final check treats the assembly as a whole product rather than as a set of parts that were each individually acceptable.

  • I1Webbing conditionEdges, surface and weave examined along the working length for damage, contamination or irregularity.
  • I2Stitch integrityStitch blocks checked for completeness, position within the overlap and absence of skipped or loose runs.
  • I3Hardware functionLatch engagement and release operated by hand; adjusters and guide loops checked for free, correct movement.
  • I4Dimensional checkWhere a length or position affects fitment, it is measured against the reference for the job.
  • I5FinishMetal and moulded parts checked for burrs, sharp edges and finish defects that could damage webbing or the user.
  • I6SegregationAnything that does not pass is physically separated so it cannot re-enter the flow by accident.

How we think about quality and safety

Station 07 — Finished product

A complete assembly, ready to fit.

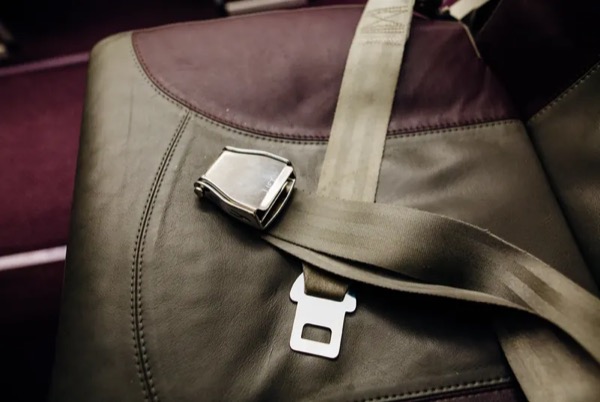
Finished lap belt assembly with webbing, metal buckle and latch plate laid across a seat
ST 07 Completed lap belt assembly with metal buckle

What leaves the line is a complete assembly — webbing, hardware and stitching as one product, matched to the application it was made for. It is identified so it can be associated with the job it belongs to, and packed so the webbing and hardware are not damaged in transit.

Traceability is kept to the extent we can genuinely support it. We do not claim record-keeping or certification systems we do not operate; if a customer needs a specific level of traceability, that is agreed at the point of enquiry rather than assumed.

Closing  —  Why the sequence exists

Seven stations, one
purpose: no surprises.

Every station in this sequence exists to remove a specific kind of variation. Material control removes variation in what goes in. Preparation removes variation in length and orientation. Assembly and stitching remove variation in how parts are joined. Hardware integration removes variation in how the belt operates. Inspection catches whatever slipped through anyway.

The result should be unremarkable, and that is the point. A customer who orders the same part twice should not be able to tell the two apart.

Read the quality and safety approach

Enquiry

Have a manufacturing
requirement?

Send the vehicle and application detail, and any photographs of the existing assembly. We will tell you what is appropriate and what information we still need.